How To Use OpenIV On PC
Are you interested in learning how to utilize OpenIV like an advanced gamer? If so, this post is a must-read. We have covered everything you need to know about the tool’s options, settings, and other advanced concepts.
Whether you are a beginner or an experienced gamer, we highly recommend following our instructions. Even if you are experienced, we guarantee that there will be something new for you to discover.
How can you specify the game location of GTA 5 in OpenIV?
To start, let’s learn how to specify the game location for GTA 5 in OpenIV. It is essential to do this in order for the tool to function properly. Please follow the steps below carefully to specify the game’s directory path.
For Steam Users:
If you have installed GTA 5 through the Steam Client, here’s what you need to do:
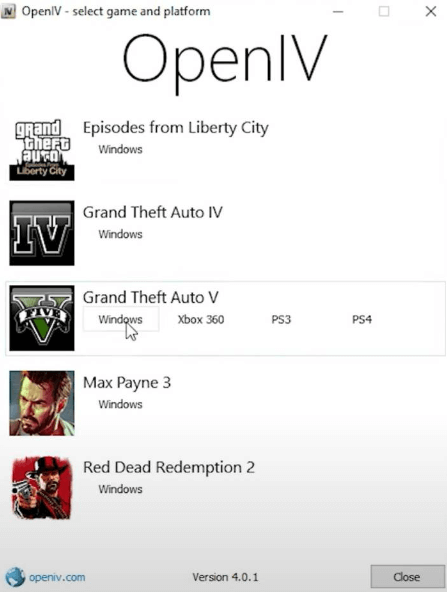
- Double-click the OpenIV shortcut on your PC’s desktop to launch it. If you haven’t downloaded the app yet, you can find it on our download page. Make sure to also read the installation guide.
- Look for the “Windows” button located below the GTA 5 section.
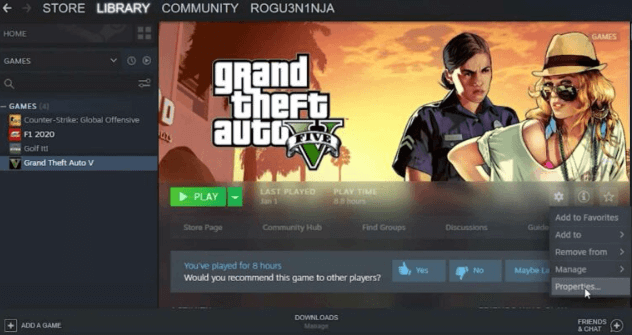
- Launch the Steam client on your PC and select “Grand Theft Auto V” from the menu on the left side.
- Click on the “Settings” button and scroll down slightly until you find the “Properties” option.
- Now, navigate to the “LOCAL FILES” section located in the left-hand side menu. Click on the “Browse” button to open the directory folder of GTA 5.
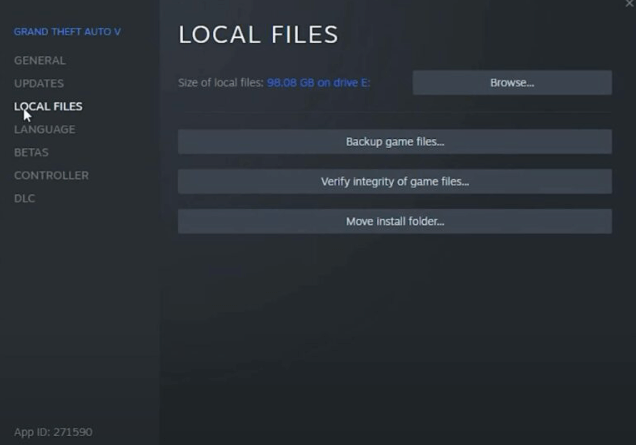
- This will open the directory folder of the GTA 5 game on your personal computer.
- On our PC, the observed path is C > Program Files (x86) > SteamLibrary > steamapps > common > Grand Theft Auto V.
- Please note that the path may vary on your PC. Follow the previous instructions to determine the exact location of GTA V’s main directory.
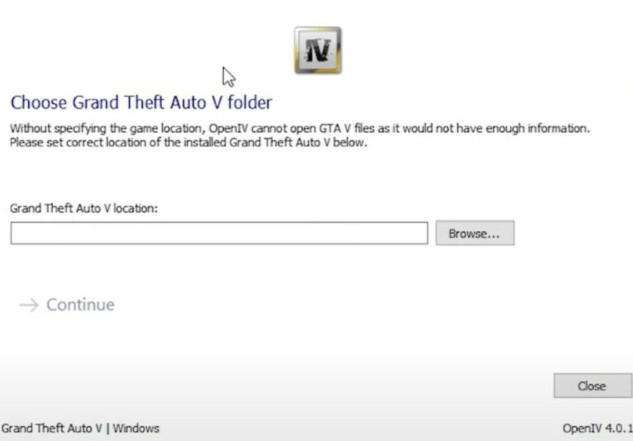
- Once you have done that, return to the OpenIV window and click the “Browse” button.
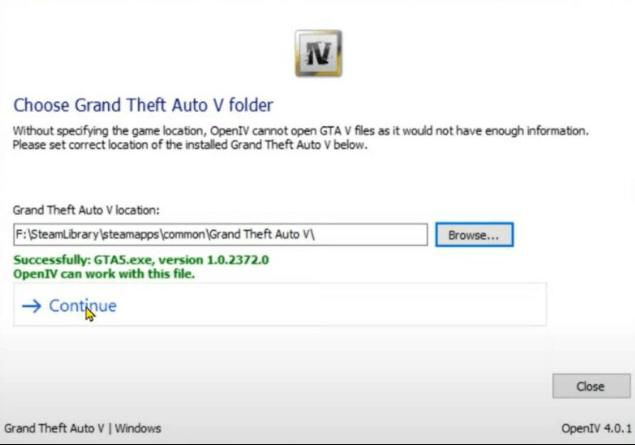
- Choose the path that you have observed on your PC (not the one we provided).
For Rockstar Games Client Users:
- Launch the Rockstar Games client on your PC.
- Select “Grand Theft Auto V” from the left side panel.
- Click on “Settings” and then choose “Grand Theft Auto V”.
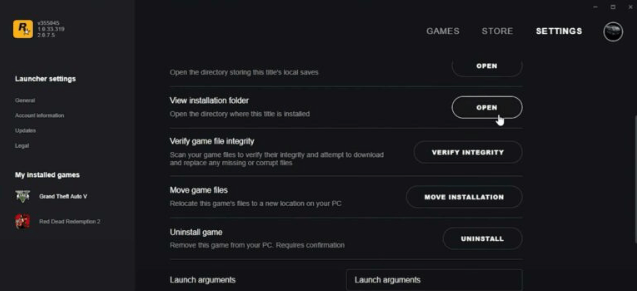
- Scroll down a bit and click on the “Open” button located next to the “View Installation Folder” option.
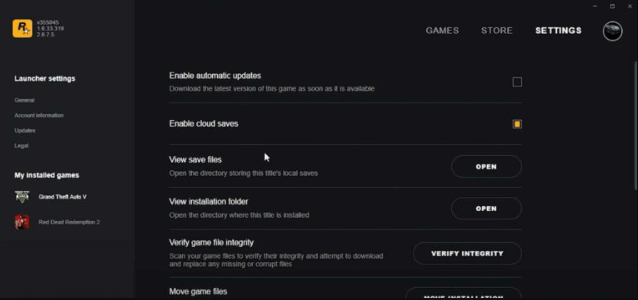
- This will open the folder, and you will be able to see the path. Take note of it and select the precise path in OpenIV.
For Epic Games Client Users:
The procedure for finding the GTA V directory is different for Epic Games users.
- Open the C Drive on your PC.
- In the folder options, navigate to “View“.
- Enable the “Hidden items” option to view hidden folders in your C Drive.
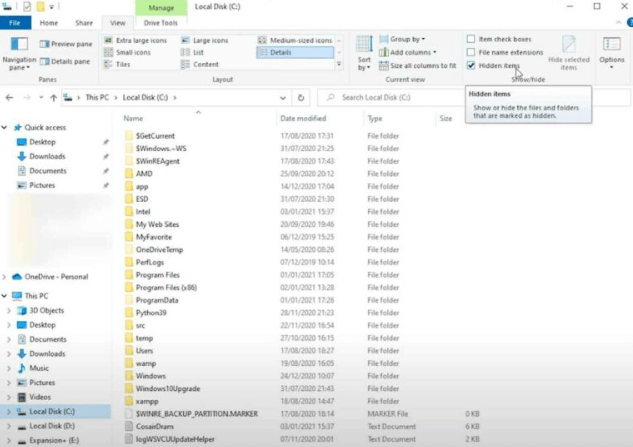
- To open the semi-visible ProgramData folder, scroll down and locate the “Epic” folder.
- Open it and then access the subfolders “EpicGamesLauncher” and “Data“.
- From there, open the “Manifests” folder, where you will find a list of various TXT files.
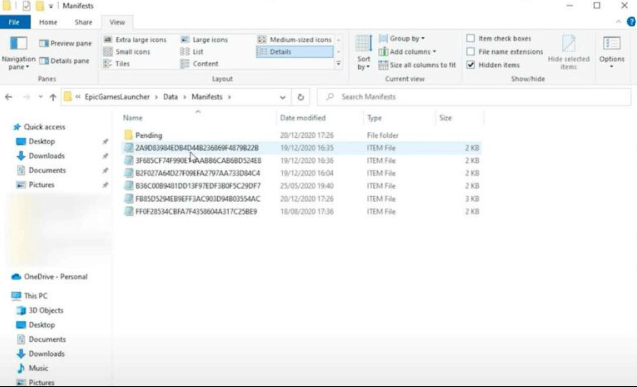
- To locate the correct file, open each file in Notepad and use the “Find” option (Control + F) to search for “GTA5.exe“.
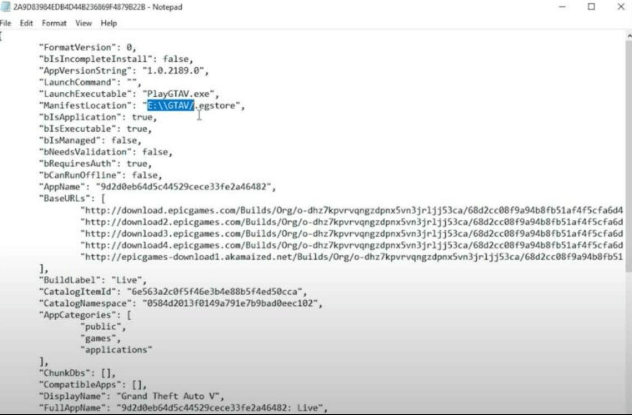
- After several attempts, you should be able to identify the correct file, which indicates the directory location of GTA 5 on your PC.
- Returning to the OpenIV window, click “Browse” and select the directory location you identified.
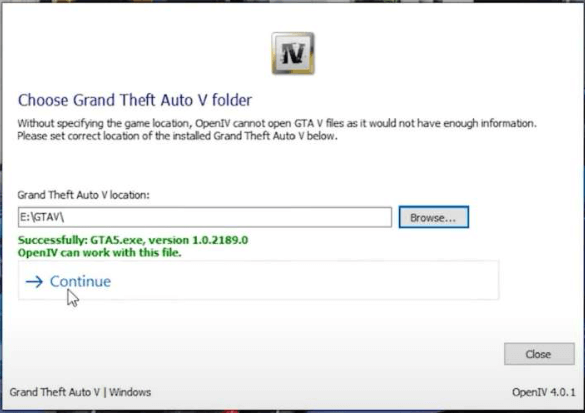
- Once you see everything in green color, click “Continue“.
OpenIV will initiate the required files and open up shortly, displaying all the files, including the “Mods” folder. For information on how to work with the mods folder, refer to the section below.
Would you like to learn how to create and utilize the mods folder in OpenIV?
Creating and using the mods folder in OpenIV requires a series of steps:
- Ensure that you have selected the main directory path of GTA V before making any changes.
- Launch the OpenIV app on your PC.
- Activate “Edit Mode” to enable editing. Remember to do this each time you want to make edits, unless you set the edit mode to be permanent.
- In the app, go to “Tools” and click on “ASI Manager“.
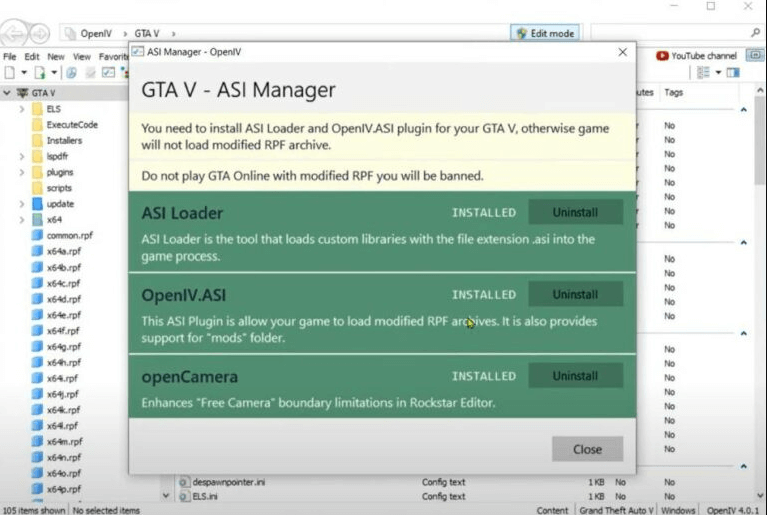
- If you have installed all the plugins as shown in the image, temporarily uninstall OpenIV.ASI and OpenCamera and then click “Close“.
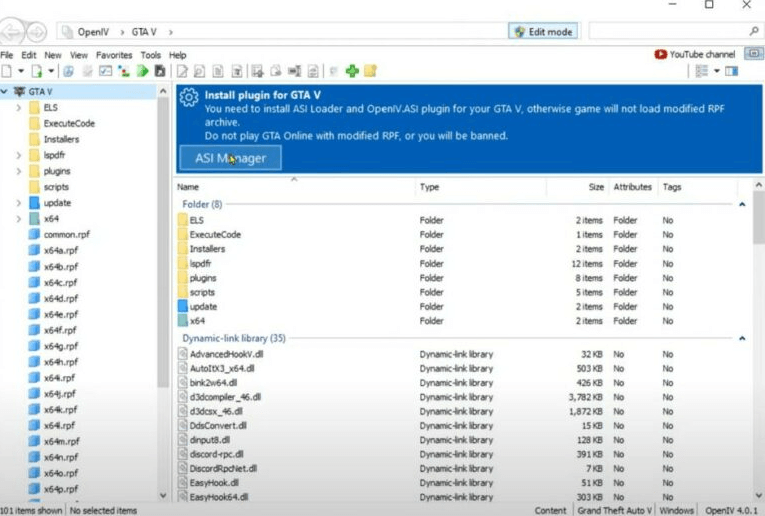
- Now, click the “ASI Manager” button and select “Install” for OpenIV.ASI.
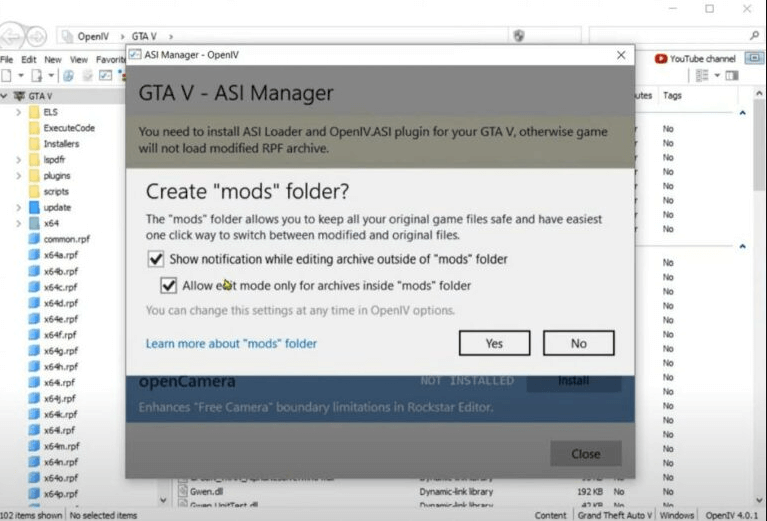
- Enable both options on the screen and click “Yes” to create the mods folder.
- Once back in the ASI Manager, make sure to install the OpenCamera plugin as well.
- Close the ASI Manager window.
- You will notice that the mods folder has been created, but it is currently empty. This folder will also be present in your main directory folder.
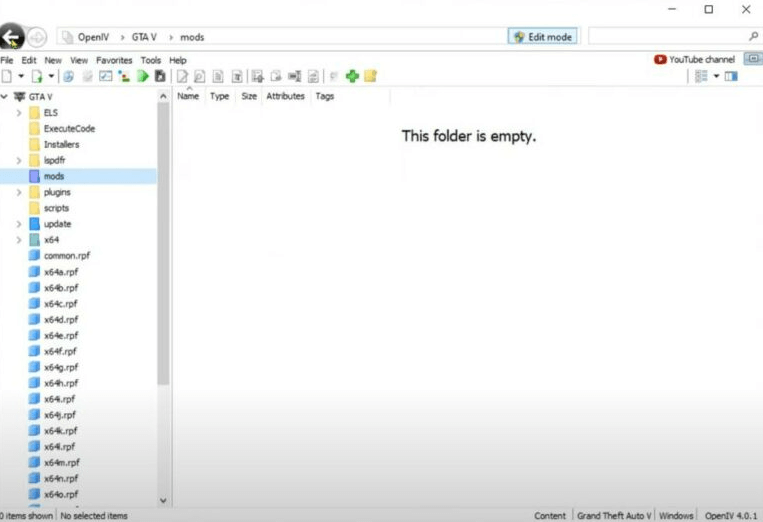
- Launch the main directory of your GTA 5 game on your PC.
- Copy both the “update” folder and the “x64” folder, and paste them into the mods folder.
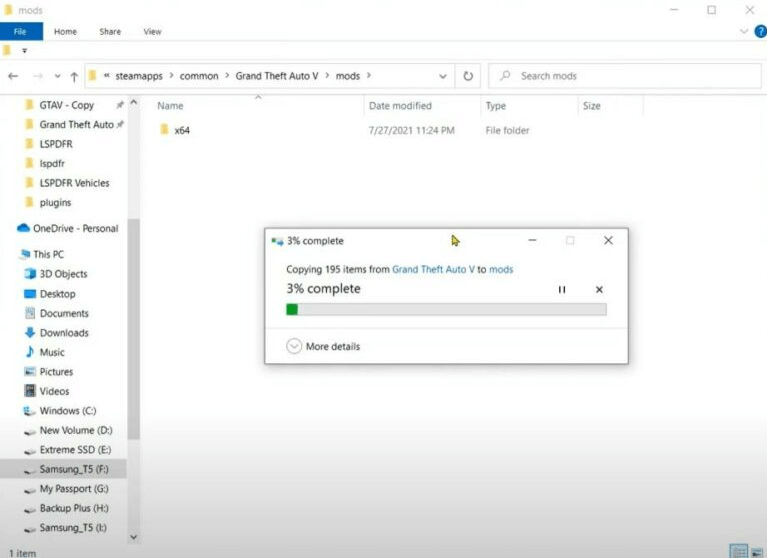
- Once the file transfer is complete, open OpenIV and access the mods folder to view its contents.
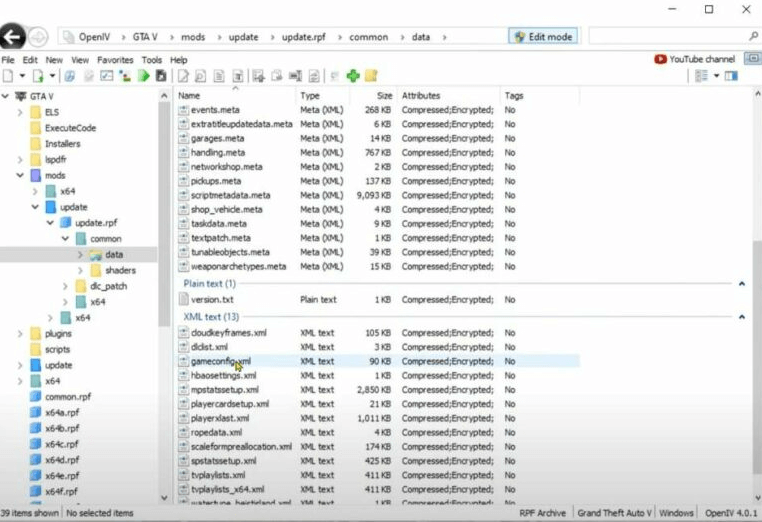
- If you have followed all the steps correctly, you should see the necessary files inside the mods folder of OpenIV.
That concludes this tutorial! Your main files are now secure, and you can enjoy editing the files and folders within the mods folder. If you have any questions, feel free to comment below for assistance.